

I absolutely love floral arranging! There’s something about taking beautiful flowers and turning them into a stunning display. For my thirtieth birthday, I had the idea to make the number “30” out of flowers. I had seen the concept for wedding and baby showers, but always using faux flowers. While faux flowers are nice, I wanted to use real ones. Really, I just wanted an excuse to go into Trader Joe’s and buy buckets of flowers for a lovely project!
This project uses real flowers, but you could absolutely substitute faux or dried flowers and follow the same steps. If you plan to use dried or faux flowers, follow the instructions for using dry foam as the flowers will not need water.
Step 1: Gather Flowers and Floral Supplies
The first thing you’re going to need to do is to gather the flowers you plan to use. You want to go for a mixture of colors, sizes, and textures. Generally, you want smaller blooms or blooms that you can cut to a smaller size, such as hydrangeas. As a general rule of thumb, do not select blooms that are wider than an inch and a half. This will allow you to keep the shape of your cardboard letter without flowers spilling over the edge.
For my floral letter, I went to Trader Joe’s and grabbed about ten different bundles of flowers and greenery. I picked a variety of flower types, sizes, and colors. If you are in the United States and have a Trader Joe’s near you, I would highly recommend going there for all your floral needs. They typically have quite the variety and are very affordable. They also sell mini bouquets which would be perfect for this project. They are about $4 each and contain a variety of smaller flowers and spray.
I would recommend making this either the day you buy the flowers or the day after. That way, you will have the freshest flowers for your letter. If you wait much longer, you run the risk that some of your flowers will wilt.

Tips for Choosing Flowers
- Pick flowers with hardy stalks like wax flowers. This is important for getting the flowers to stay in the foam.
- Pick 2-3 large flowers, 2-3 sets of small flowers, 2-3 assortments of spray, and 1-2 types of greenery
- Pick assorted complementary colors
- If you can, pick an arrangement or two instead of buying individual sets of flowers to reduce waste
Suggested Flowers to Use
- Chamomile flowers
- Pina colada
- Baby’s Breath
- Wax flowers
- Eucalyptus
- Large and small mums
- Spray
- Mini carnations
- Queen Anne’s Lace
- Hydrangeas

Floral Supplies
- Cardboard letter
- Floral Foam (wet)
- Buckets for the flowers
- Craft Knife
- Floral snips
- Hot glue gun
- Acrylic paint and paintbrushes (if you choose to paint your letter)
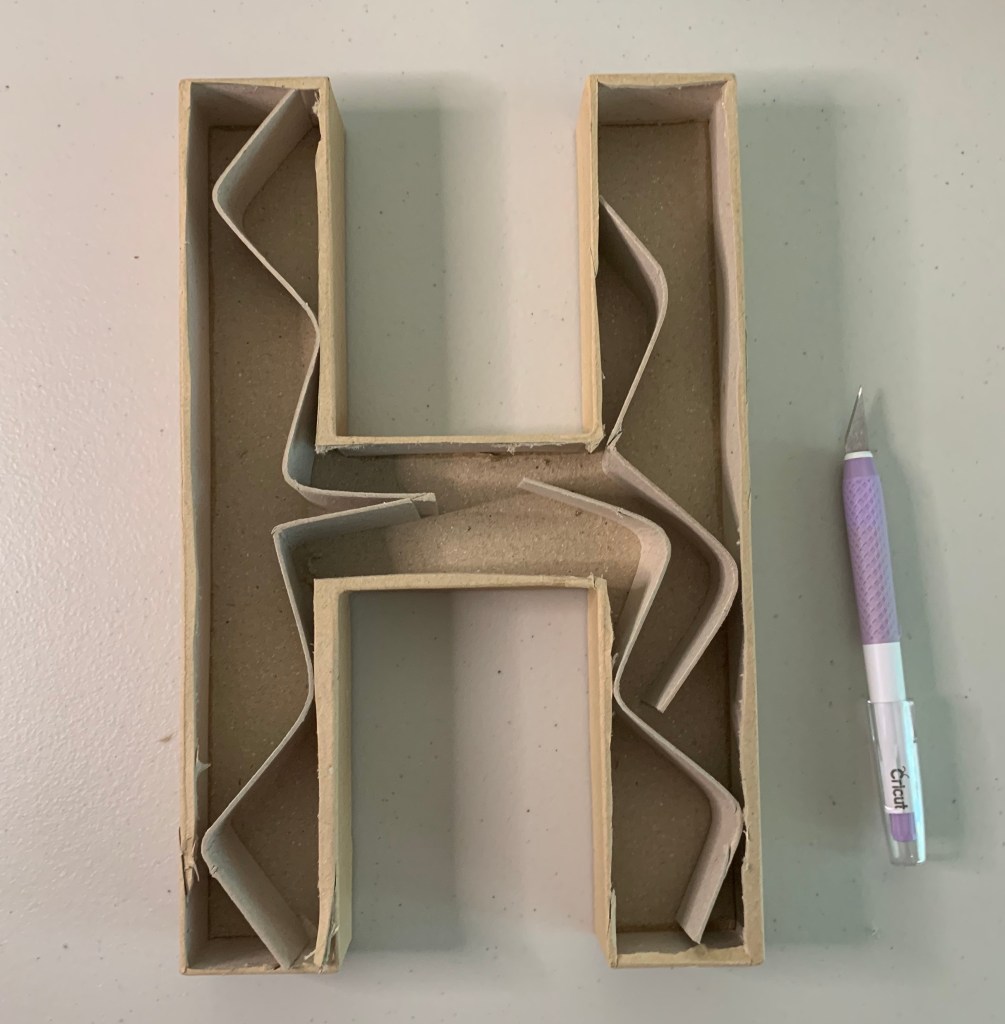
Step 2: Prep cardboard letter and floral foam
The first thing you’re going to do is take the cardboard letter and cut off the top layer. If you bought the letter style I have listed under floral supplies, the inside should be mostly hollow. Pull out any cardboard or paper that is inside the cardboard letter. From here you can paint the letter your color of choice or leave it unpainted if you want a more rustic look. If you plan to display your design somewhere prominent I would recommend painting it, because it gives it more of a clean, finished look.
Next, cut the floral foam into small sections. They should be wide enough that they fit snuggly into the cardboard letter. When in doubt, cut larger pieces, you can always cut off more if you need to.
For the next step, you have two options: wet floral foam or dry floral foam. I have made this project in two different ways: one with wet floral foam, and one where I did not wet the floral foam. If you choose to wet the floral foam, your flowers will stay fresh significantly longer, up to a few days! The downside to this choice is that you will not be able to hold the letter upright without the water spilling out, which is not ideal if you’re planning to use this as a display.
If you choose to use wet floral foam, you are going to want to line the inside of the letter with aluminum foil or plastic wrap and then fully submerge your foam in water. Then place the wet floral foam pieces into the letter, one by one until the letter is completely filled with wet floral foam.
If you choose dry floral foam, you will want to fit all the pieces of floral foam into the letter until it is completely filled. From there, you can either leave them as is or you can hot glue the pieces in place. If you are using this as a display, I would definitely recommend hot gluing the foam in place. This will hold the foam in and make sure none of it falls out transit.
Step 3: Fill in with flowers
Now comes the fun part! Once the floral foam is snug in the cardboard letter, you’re ready to start filling in your letter with flowers! For this, I usually start with one corner and build from there. Cut each stem to about an inch and carefully insert it into the foam. You want to make sure the flowers fully cover the foam and extend slightly over the edge to cover the materials.

Tips for Filling letter with flowers
- Work section by section
- Don’t be afraid to rearrange, the foam is very forgiving
- If you are having trouble getting the stems to stay in place, use a dab of hot glue on the stem before inserting it into the foam.
- Start by placing larger blooms and fill in with smaller blooms and greenery
Step 4: Display!
Now that you have your floral letter completed, it’s time to show it off! Take pictures and display them proudly! To get your letter to stand up, I would recommend leaning it on a small easel. If you have extra flowers at the end, try creating some small arrangements in bud vases or little jars.
I hope you enjoyed this project! If you decide to make it, send me pictures or tag my Instagram @erinevelynreads so I can see your creations!
